Add authentication to your Angular application
This guide will show you how to integrate Logto Angular SDK v2 into your application.
- This guide uses the first-party
@logto/angularv2 SDK, which supports Angular 20 and provides dependency injection and Signals. - The sample project is available in our SDK repository.
Prerequisites
- A Logto Cloud account or a self-hosted Logto.
- A single-page application (SPA) created in Logto Console.
- An Angular 20 project.
Installation
Install Logto SDK via your favorite package manager:
- npm
- pnpm
- yarn
npm i @logto/angularpnpm add @logto/angularyarn add @logto/angularIntegration
Init Logto provider
In your Angular project, register provideLogto and your application routes in app.config.ts:
import { type ApplicationConfig } from '@angular/core';
import { provideRouter } from '@angular/router';
import { provideLogto } from '@logto/angular';

import { routes } from './app.routes';

export const appConfig: ApplicationConfig = {
  providers: [
    provideLogto({
      endpoint: '<your-logto-endpoint>',
      appId: '<your-app-id>',
    }),
    provideRouter(routes),
    // ...other providers
  ],
};
provideLogto restores authentication state automatically after the first browser render. You do not need to call an initialization method in your components.
When using server-side rendering (SSR), authentication state and tokens are available only in the
browser. Use isLoading() to show a loading state until initialization finishes. If you need
authenticated data during server rendering, use a server or BFF SDK.
Configure redirect URIs
Before we dive into the details, here's a quick overview of the end-user experience. The sign-in process can be simplified as follows:
- Your app invokes the sign-in method.
- The user is redirected to the Logto sign-in page. For native apps, the system browser is opened.
- The user signs in and is redirected back to your app (configured as the redirect URI).
Regarding redirect-based sign-in
- This authentication process follows the OpenID Connect (OIDC) protocol, and Logto enforces strict security measures to protect user sign-in.
- If you have multiple apps, you can use the same identity provider (Logto). Once the user signs in to one app, Logto will automatically complete the sign-in process when the user accesses another app.
To learn more about the rationale and benefits of redirect-based sign-in, see Logto sign-in experience explained.
In the following code snippets, we assume your app is running on http://localhost:3000/.
Configure redirect URIs
Switch to the application details page of Logto Console. Add a redirect URI http://localhost:3000/callback.
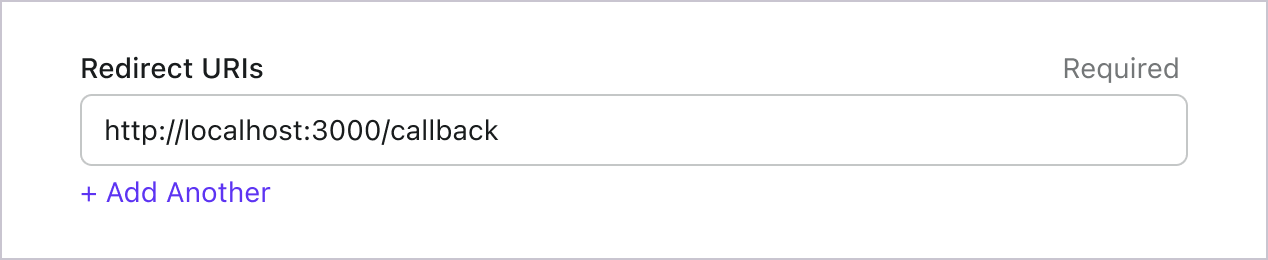
Just like signing in, users should be redirected to Logto for signing out of the shared session. Once finished, it would be great to redirect the user back to your website. For example, add http://localhost:3000/ as the post sign-out redirect URI section.
Then click "Save" to save the changes.
Handle redirect
Create a callback component to complete sign-in after Logto redirects the user back to your application. Use afterNextRender so callback handling runs only in the browser:
import { afterNextRender, Component, inject } from '@angular/core';
import { LogtoService } from '@logto/angular';

@Component({
  selector: 'app-callback',
  standalone: true,
  template: `
    @if (logto.error(); as error) {
      <p role="alert">{{ error.message }}</p>
    } @else {
      <p>Completing sign-in...</p>
    }
  `,
})
export class CallbackComponent {
  readonly logto = inject(LogtoService);

  constructor() {
    afterNextRender(() => {
      void (async () => {
        const callbackUri = window.location.href;

        if (!(await this.logto.isSignInRedirected(callbackUri))) {
          window.location.replace(window.location.origin);
          return;
        }

        await this.logto.handleSignInCallback(callbackUri);
      })().catch(() => {
        // The SDK exposes callback errors through logto.error() for the template.
      });
    });
  }
}
isSignInRedirected() checks whether the URL matches an active sign-in session. If someone visits the callback route without one, this example returns them to the application home page instead of attempting to complete sign-in.
Register the callback route in app.routes.ts. It must match the path of your redirect URI and must not require authentication. For example, use callback for a redirect URI ending in /callback:
import { type Routes } from '@angular/router';

import { CallbackComponent } from './callback.component';

export const routes: Routes = [
  { path: 'callback', component: CallbackComponent },
  // ...other routes
];
The root component needs a <router-outlet /> to render this route, as shown in the next step.
Implement sign-in and sign-out
Inject LogtoService to start sign-in and sign-out. Pass the registered redirect URIs to these methods. The postRedirectUri tells the SDK where to navigate after successfully handling the sign-in callback:
Before calling signIn(), make sure you have correctly configured Redirect URI
in Admin Console.
import { Component, inject } from '@angular/core';
import { RouterOutlet } from '@angular/router';
import { LogtoService } from '@logto/angular';

@Component({
  selector: 'app-root',
  standalone: true,
  imports: [RouterOutlet],
  templateUrl: './app.component.html',
})
export class AppComponent {
  readonly logto = inject(LogtoService);

  async signIn() {
    await this.logto.signIn({
      redirectUri: 'http://localhost:3000/callback',
      postRedirectUri: window.location.origin,
    });
  }

  async signOut() {
    await this.logto.signOut('http://localhost:3000/');
  }
}
Read the isLoading(), isAuthenticated(), and error() Signals directly in the template:
@if (logto.error(); as error) {
<p role="alert">{{ error.message }}</p>
} @if (logto.isLoading()) {
<p>Loading...</p>
} @else if (logto.isAuthenticated()) {
<button type="button" (click)="signOut()">Sign out</button>
} @else {
<button type="button" (click)="signIn()">Sign in</button>
}

<router-outlet />
Keep <router-outlet /> outside the authentication conditions so the callback can render before the user is signed in.
Calling .signOut() will clear all the Logto data in memory and localStorage if they exist.
Checkpoint: Test your application
Now, you can test your application:
- Run your application, you will see the sign-in button.
- Click the sign-in button, the SDK will init the sign-in process and redirect you to the Logto sign-in page.
- After you signed in, you will be redirected back to your application and see the sign-out button.
- Click the sign-out button to clear token storage and sign out.
Get user information
Display user information
To display the user's information, use getIdTokenClaims() to read claims from the ID token without an additional network request. Add an effect to your AppComponent to load the claims when isAuthenticated() becomes true, including when an existing session is restored. Import JsonPipe to display the result:
import { JsonPipe } from '@angular/common';
import { Component, effect, inject, signal } from '@angular/core';
import { RouterOutlet } from '@angular/router';
import { LogtoService, type IdTokenClaims } from '@logto/angular';

@Component({
  selector: 'app-root',
  standalone: true,
  imports: [JsonPipe, RouterOutlet],
  templateUrl: './app.component.html',
})
export class AppComponent {
  readonly logto = inject(LogtoService);
  readonly user = signal<IdTokenClaims | undefined>(undefined);

  constructor() {
    effect(() => {
      if (!this.logto.isAuthenticated()) {
        this.user.set(undefined);
        return;
      }

      void this.logto
        .getIdTokenClaims()
        .then((claims) => {
          this.user.set(claims);
        })
        .catch(() => {
          // The SDK exposes the error through logto.error() for the template.
        });
    });
  }

  // ...keep the signIn() and signOut() methods from the previous step
}
Add the following inside the logto.isAuthenticated() branch of your template:
@if (user(); as claims) {
<pre>{{ claims | json }}</pre>
}
Request additional claims
You may find some user information are missing in the returned object from getIdTokenClaims(). This is because OAuth 2.0 and OpenID Connect (OIDC) are designed to follow the principle of least privilege (PoLP), and Logto is built on top of these standards.
By default, limited claims are returned. If you need more information, you can request additional scopes to access more claims.
A "claim" is an assertion made about a subject; a "scope" is a group of claims. In the current case, a claim is a piece of information about the user.
Here's a non-normative example the scope - claim relationship:
The "sub" claim means "subject", which is the unique identifier of the user (i.e. user ID).
Logto SDK will always request three scopes: openid, profile, and offline_access.
Add the scopes to your provideLogto configuration:
import { type ApplicationConfig } from '@angular/core';
import { provideLogto, UserScope } from '@logto/angular';

export const appConfig: ApplicationConfig = {
  providers: [
    provideLogto({
      endpoint: '<your-logto-endpoint>',
      appId: '<your-app-id>',
      scopes: [
        UserScope.Email,
        UserScope.Phone,
        UserScope.CustomData,
        UserScope.Identities,
        UserScope.Organizations,
      ],
    }),
    // ...other providers
  ],
};
Sign in again after changing the scopes. The additional ID token claims, such as email and phone_number, will be available from getIdTokenClaims() and displayed by the example above.
Claims that need network requests
To prevent bloating the ID token, some claims require network requests to fetch. For example, the custom_data claim is not included in the user object even if it's requested in the scopes. To access these claims, you can use the fetchUserInfo() method:
// Add this method to AppComponent and call it after sign-in.
async loadUserInfo() {
const userInfo = await this.logto.fetchUserInfo();
// Now you can access userInfo.custom_data, userInfo.identities, etc.
return userInfo;
}
fetchUserInfo() can be used alongside API resource access tokens. Configuring resources does not prevent the SDK from requesting user information.
Scopes and claims
Logto uses OIDC scopes and claims conventions to define the scopes and claims for retrieving user information from the ID token and OIDC userinfo endpoint. Both of the "scope" and the "claim" are terms from the OAuth 2.0 and OpenID Connect (OIDC) specifications.
For standard OIDC claims, the inclusion in the ID token is strictly determined by the requested scopes. Extended claims (such as custom_data and organizations) can be additionally configured to appear in the ID token through the Custom ID token settings.
Here's the list of supported scopes and the corresponding claims:
Standard OIDC scopes
openid (default)
| Claim name | Type | Description |
|---|---|---|
| sub | string | The unique identifier of the user |
profile (default)
| Claim name | Type | Description |
|---|---|---|
| name | string | The full name of the user |
| username | string | The username of the user |
| picture | string | URL of the End-User's profile picture. This URL MUST refer to an image file (for example, a PNG, JPEG, or GIF image file), rather than to a Web page containing an image. Note that this URL SHOULD specifically reference a profile photo of the End-User suitable for displaying when describing the End-User, rather than an arbitrary photo taken by the End-User. |
| created_at | number | Time the End-User was created. The time is represented as the number of milliseconds since the Unix epoch (1970-01-01T00:00:00Z). |
| updated_at | number | Time the End-User's information was last updated. The time is represented as the number of milliseconds since the Unix epoch (1970-01-01T00:00:00Z). |
Other standard claims include family_name, given_name, middle_name, nickname, preferred_username, profile, website, gender, birthdate, zoneinfo, and locale will be also included in the profile scope without the need for requesting the userinfo endpoint. A difference compared to the claims above is that these claims will only be returned when their values are not empty, while the claims above will return null if the values are empty.
Unlike the standard claims, the created_at and updated_at claims are using milliseconds instead of seconds.
email
| Claim name | Type | Description |
|---|---|---|
string | The email address of the user | |
| email_verified | boolean | Whether the email address has been verified |
phone
| Claim name | Type | Description |
|---|---|---|
| phone_number | string | The phone number of the user |
| phone_number_verified | boolean | Whether the phone number has been verified |
address
Please refer to the OpenID Connect Core 1.0 for the details of the address claim.
Scopes marked with (default) are always requested by the Logto SDK. Claims under standard OIDC scopes are always included in the ID token when the corresponding scope is requested — they cannot be turned off.
Extended scopes
The following scopes are extended by Logto and will return claims through the userinfo endpoint. These claims can also be configured to be included directly in the ID token through Console > Custom JWT. See Custom ID token for more details.
custom_data
| Claim name | Type | Description | Included in ID token by default |
|---|---|---|---|
| custom_data | object | The custom data of the user |
identities
| Claim name | Type | Description | Included in ID token by default |
|---|---|---|---|
| identities | object | The linked identities of the user | |
| sso_identities | array | The linked SSO identities of the user |
roles
| Claim name | Type | Description | Included in ID token by default |
|---|---|---|---|
| roles | string[] | The roles of the user | ✅ |
urn:logto:scope:organizations
| Claim name | Type | Description | Included in ID token by default |
|---|---|---|---|
| organizations | string[] | The organization IDs the user belongs to | ✅ |
| organization_data | object[] | The organization data the user belongs to |
These organization claims can also be retrieved via the userinfo endpoint when using an opaque token. However, opaque tokens cannot be used as organization tokens for accessing organization-specific resources. See Opaque token and organizations for more details.
urn:logto:scope:organization_roles
| Claim name | Type | Description | Included in ID token by default |
|---|---|---|---|
| organization_roles | string[] | The organization roles the user belongs to with the format of <organization_id>:<role_name> | ✅ |
API resources
We recommend to read 🔐 Role-Based Access Control (RBAC) first to understand the basic concepts of Logto RBAC and how to set up API resources properly.
Configure Logto client
Once you have set up the API resources, you can add them when configuring Logto in your app:
import { type ApplicationConfig } from '@angular/core';
import { provideLogto } from '@logto/angular';

export const appConfig: ApplicationConfig = {
  providers: [
    provideLogto({
      endpoint: '<your-logto-endpoint>',
      appId: '<your-app-id>',
      resources: ['https://shopping.your-app.com/api', 'https://store.your-app.com/api'],
    }),
    // ...other providers
  ],
};
Each API resource has its own permissions (scopes).
For example, the https://shopping.your-app.com/api resource has the shopping:read and shopping:write permissions, and the https://store.your-app.com/api resource has the store:read and store:write permissions.
To request these permissions, you can add them when configuring Logto in your app:
import { type ApplicationConfig } from '@angular/core';
import { provideLogto } from '@logto/angular';

export const appConfig: ApplicationConfig = {
  providers: [
    provideLogto({
      endpoint: '<your-logto-endpoint>',
      appId: '<your-app-id>',
      scopes: ['shopping:read', 'shopping:write', 'store:read', 'store:write'],
      resources: ['https://shopping.your-app.com/api', 'https://store.your-app.com/api'],
    }),
    // ...other providers
  ],
};
You may notice that scopes are defined separately from API resources. This is because Resource Indicators for OAuth 2.0 specifies the final scopes for the request will be the cartesian product of all the scopes at all the target services.
Thus, in the above case, scopes can be simplified from the definition in Logto, both of the API resources can have read and write scopes without the prefix. Then, in the Logto config:
import { type ApplicationConfig } from '@angular/core';
import { provideLogto } from '@logto/angular';

export const appConfig: ApplicationConfig = {
  providers: [
    provideLogto({
      endpoint: '<your-logto-endpoint>',
      appId: '<your-app-id>',
      scopes: ['read', 'write'],
      resources: ['https://shopping.your-app.com/api', 'https://store.your-app.com/api'],
    }),
    // ...other providers
  ],
};
For every API resource, it will request for both read and write scopes.
It is fine to request scopes that are not defined in the API resources. For example, you can request the email scope even if the API resources don't have the email scope available. Unavailable scopes will be safely ignored.
After the successful sign-in, Logto will issue proper scopes to API resources according to the user's roles.
Sign in again after changing the resources or scopes so the user can authorize the updated configuration.
Fetch access token for the API resource
To fetch the access token for a specific API resource, you can use the getAccessToken() method:
import { Component, inject, signal } from '@angular/core';
import { LogtoService } from '@logto/angular';

@Component({
  selector: 'app-api-resource',
  standalone: true,
  template: `
    @if (logto.error(); as error) {
      <p role="alert">{{ error.message }}</p>
    }
    @if (logto.isAuthenticated()) {
      <button type="button" [disabled]="logto.isLoading()" (click)="loadAccessToken()">
        Get API access token
      </button>
      <pre>{{ accessToken() }}</pre>
    }
  `,
})
export class ApiResourceComponent {
  readonly logto = inject(LogtoService);
  readonly accessToken = signal('');

  async loadAccessToken() {
    this.accessToken.set(await this.logto.getAccessToken('https://shopping.your-app.com/api'));
  }
}
This method will return a JWT access token that can be used to access the API resource when the user has related permissions. If the current cached access token has expired, this method will automatically try to use a refresh token to get a new access token.
Use the exact resource identifier from your configuration. Call getAccessToken(resource) whenever you make an API request so the SDK can return a valid token, rather than keeping a token indefinitely in your component.
Fetch organization tokens
If organization is new to you, please read 🏢 Organizations (Multi-tenancy) to get started.
You need to add UserScope.Organizations scope when configuring the Logto client:
import { type ApplicationConfig } from '@angular/core';
import { provideLogto, UserScope } from '@logto/angular';

export const appConfig: ApplicationConfig = {
  providers: [
    provideLogto({
      endpoint: '<your-logto-endpoint>',
      appId: '<your-app-id>',
      scopes: [UserScope.Organizations],
    }),
    // ...other providers
  ],
};
Once the user is signed in, you can fetch the organization token for the user:
import { Component, effect, inject, signal } from '@angular/core';
import { LogtoService } from '@logto/angular';

@Component({
  selector: 'app-organizations',
  standalone: true,
  template: `
    @if (logto.error(); as error) {
      <p role="alert">{{ error.message }}</p>
    }
    @if (logto.isAuthenticated()) {
      <ul>
        @for (organizationId of organizationIds(); track organizationId) {
          <li>
            <span>{{ organizationId }}</span>
            <button
              type="button"
              [disabled]="logto.isLoading()"
              (click)="loadOrganizationToken(organizationId)"
            >
              Get organization token
            </button>
          </li>
        }
      </ul>
      <pre>{{ organizationToken() }}</pre>
    }
  `,
})
export class OrganizationsComponent {
  readonly logto = inject(LogtoService);
  readonly organizationIds = signal<string[]>([]);
  readonly organizationToken = signal('');

  constructor() {
    effect(() => {
      if (!this.logto.isAuthenticated()) {
        this.organizationIds.set([]);
        this.organizationToken.set('');
        return;
      }

      void this.logto
        .getIdTokenClaims()
        .then((claims) => {
          this.organizationIds.set(claims.organizations ?? []);
        })
        .catch(() => {
          // The SDK exposes the error through logto.error() for the template.
        });
    });
  }

  async loadOrganizationToken(organizationId: string) {
    this.organizationToken.set(await this.logto.getOrganizationToken(organizationId));
  }
}
Merge UserScope.Organizations with any existing scopes, and sign in again after updating the configuration. getOrganizationToken(organizationId) returns a token for the selected Logto organization; use getAccessToken(resource) for an API resource token.
Attach access token to request headers
Put the token in the Authorization HTTP header using the Bearer format (Bearer YOUR_TOKEN). For example, add this method to an authenticated component that injects LogtoService:
async fetchProducts() {
  const accessToken = await this.logto.getAccessToken('https://shopping.your-app.com/api');
  const response = await fetch('https://shopping.your-app.com/api/products', {
    headers: {
      Authorization: `Bearer ${accessToken}`,
    },
  });

  if (!response.ok) {
    throw new Error(`Request failed: ${response.status}`);
  }

  return response.json();
}
The example uses fetch. If you use Angular HttpClient, set the same Authorization header in its request options.